How-To manage Group delivery for an exam.
Prerequisite for FS-tests
The test must be disconnected from FS for the group delivery option to become available
Inspera Assessment supports both individual delivery and group delivery of exams. This document describes how to set up group deliveries.
There are three ways to create the groups in an exam:
Activate Group Submission
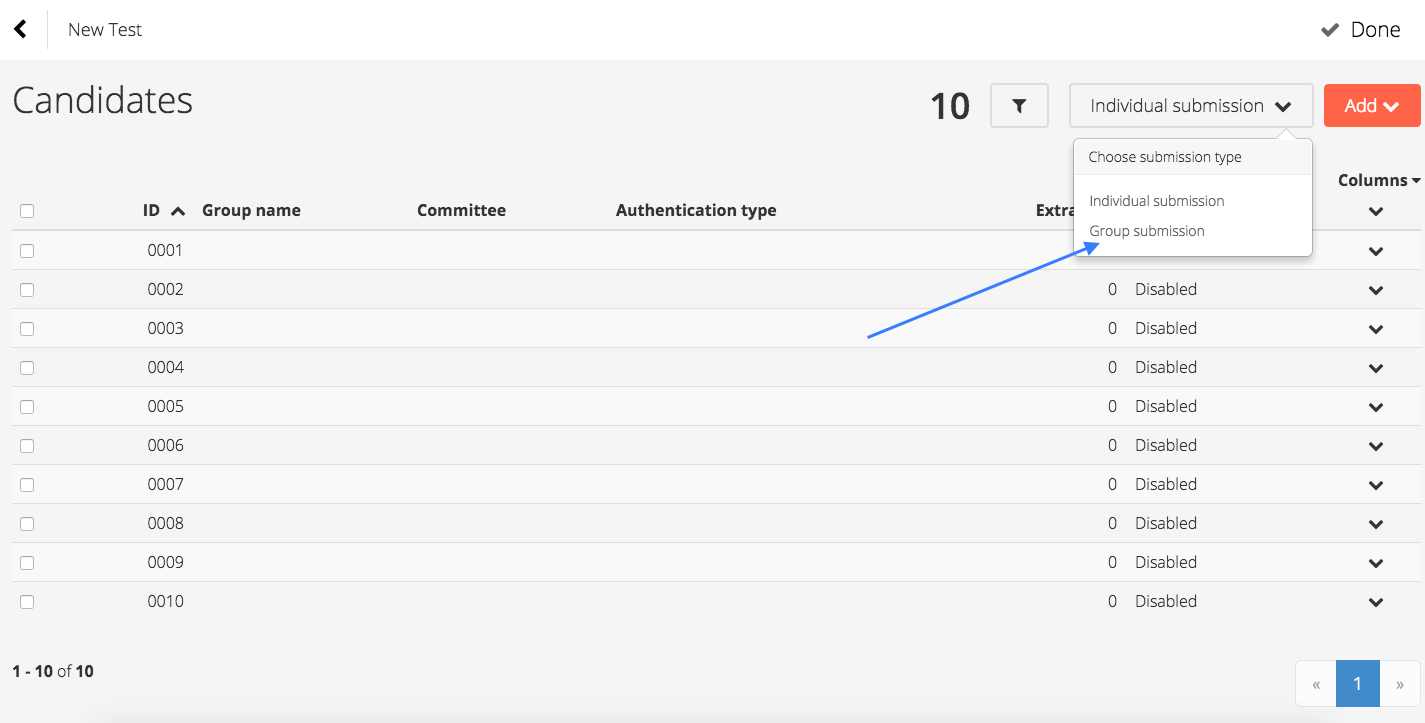
When assigning candidates in the setup of an exam, you first assign candidates. The default setting in an exam is Individual submission. To change to Group submission, open the drop down menu named Individual submission and choose Group submission:
How-To-Guide for setup of random groups
When group submission mode is activated (above) you are presented with some options on how to create the groups:
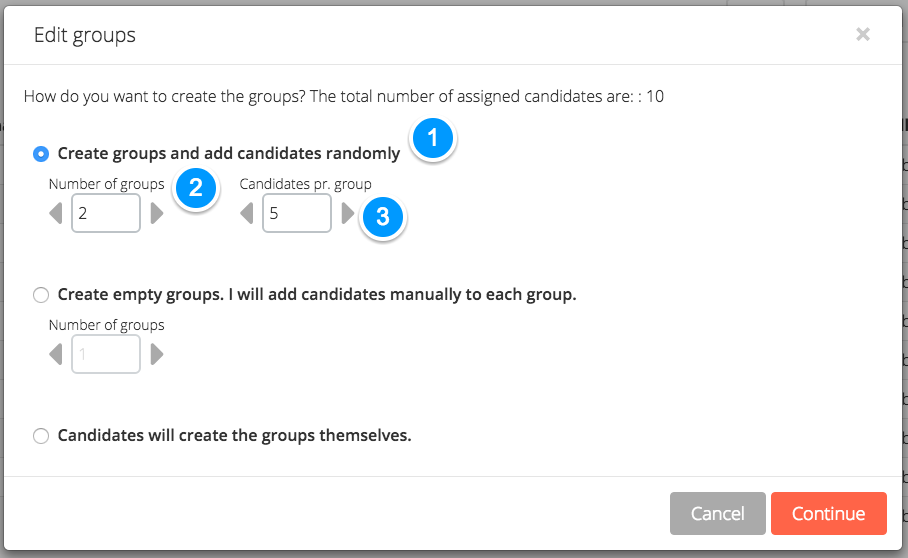
- Choose the Create groups and add candidates randomly
- Decide the number of groups
- Decide how many candidates should be in each group
- Click Continue
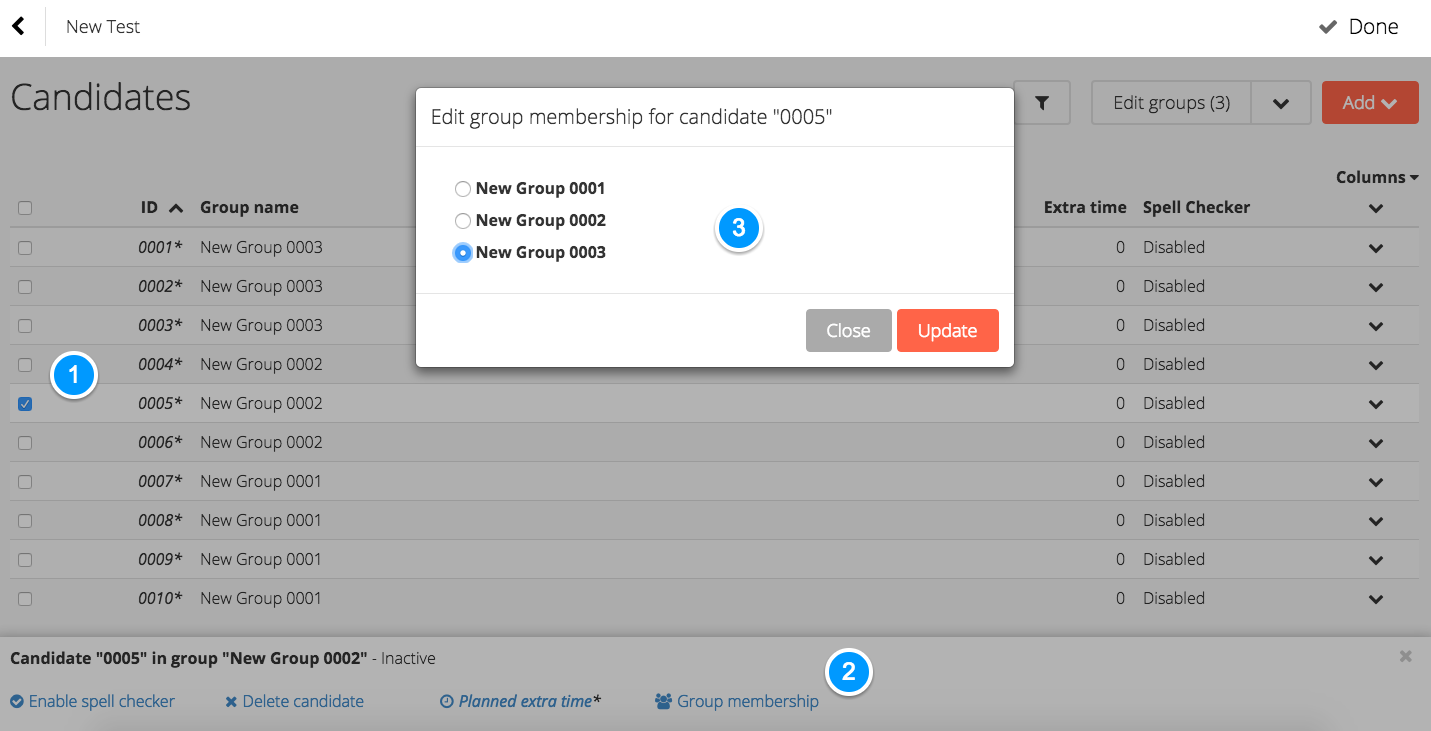
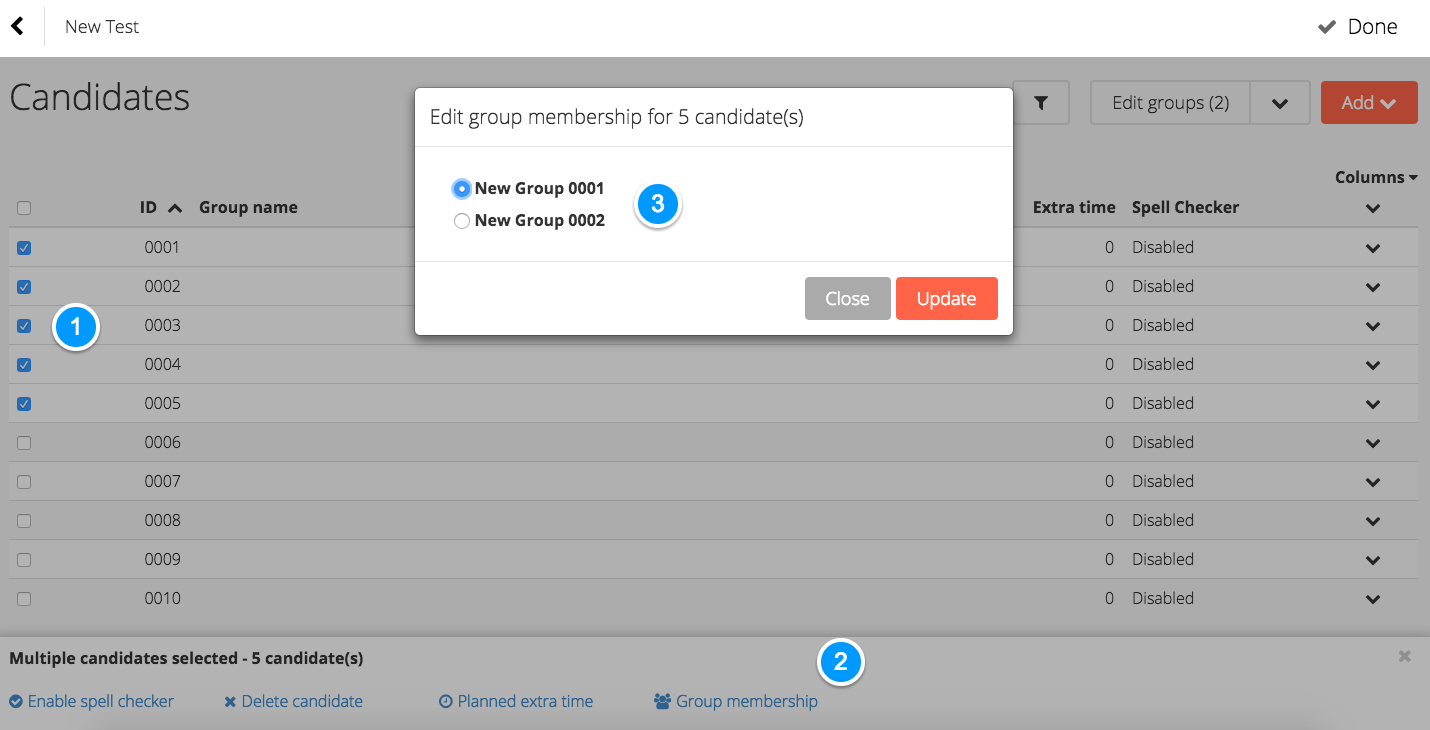
Note, if the number of groups and candidates per group does not add up, the "left over candidates" are automatically placed in groups. To change the group membership:
- Select the candidate(s)
- Click Group membership
- Select the group the candidate(s) should be added to and press Update:
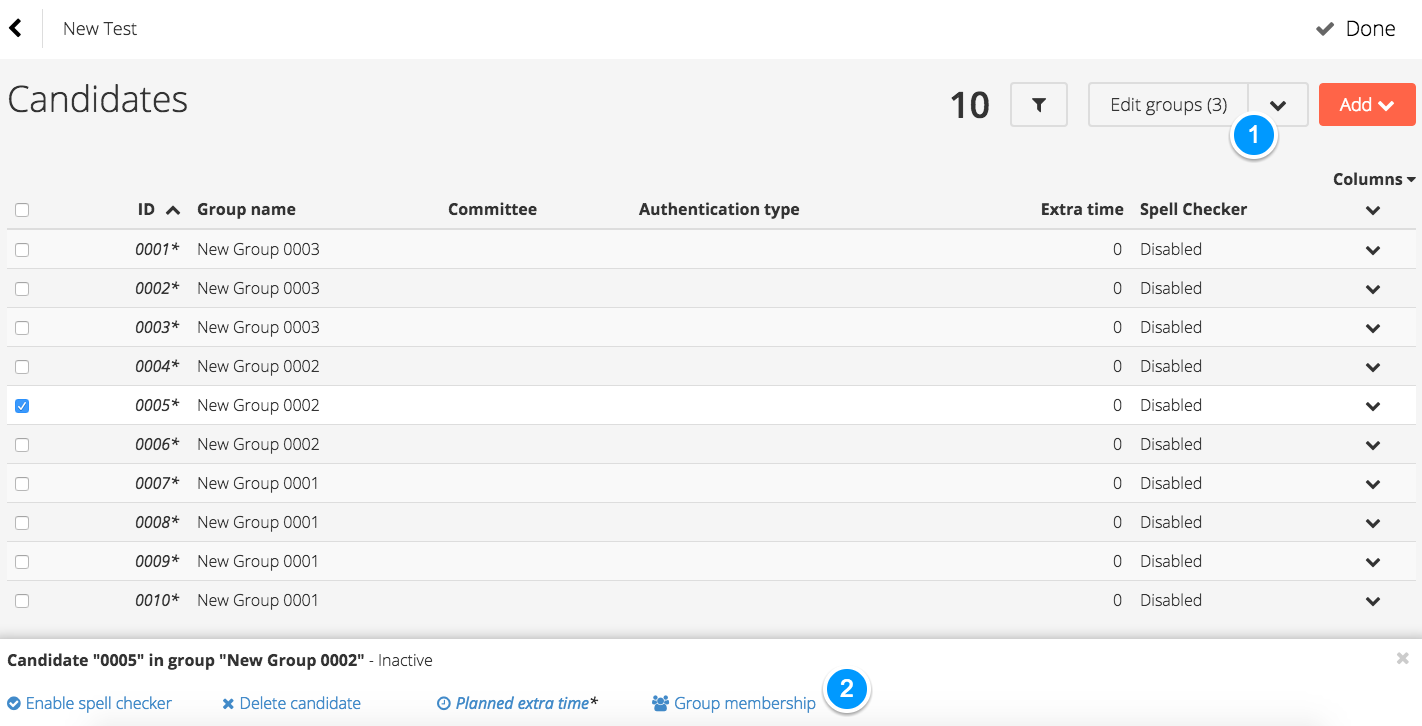
Groups can generally be edited by:
- Edit the groups (name, number of groups) by clicking Edit groups
- Edit the group membership of one or more candidates by selecting these and clicking Group membership. Then select the group they should be added to
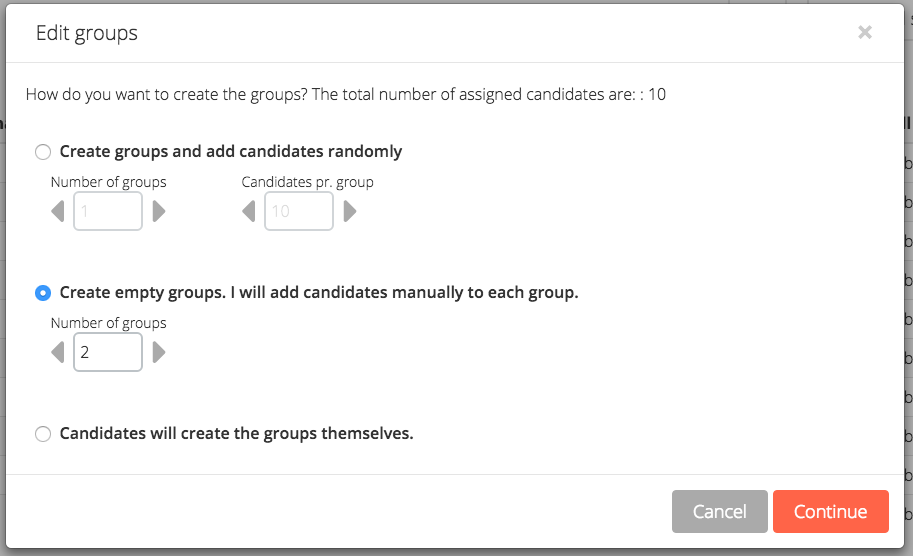
How-To-Guide for manually setup of candidates in groups
In the dialog box that opens when selecting Group delivery; choose the option Create empty groups. I will add candidates manually to each group. Decide the number of groups. Finally, click Continue:
To add candidates to the groups:
- Select the candidates to be added to the first group
- Click Group membership
- Select the group these candidates should be added to
Repeat the process until all candidates are allocated into groups
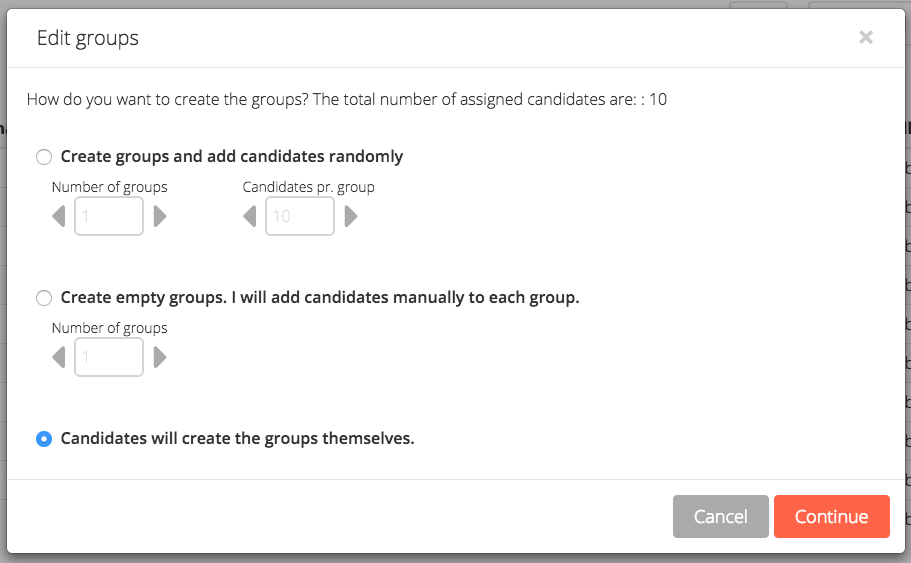
How-To-Guide for setup of groups to be created by the candidates
In the dialog box that opens when Group submission is selected; choose the option Candidates will create the groups themselves:
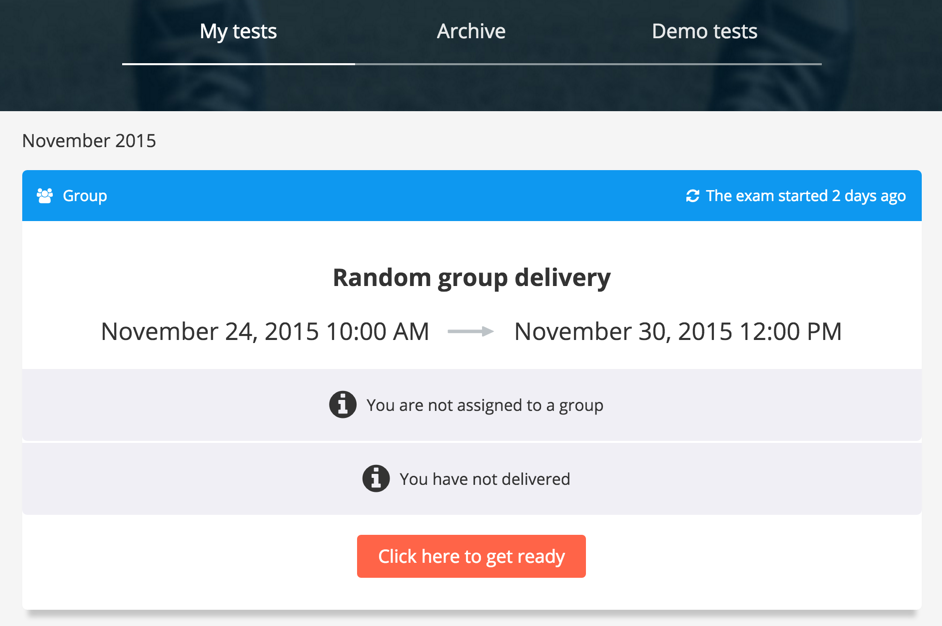
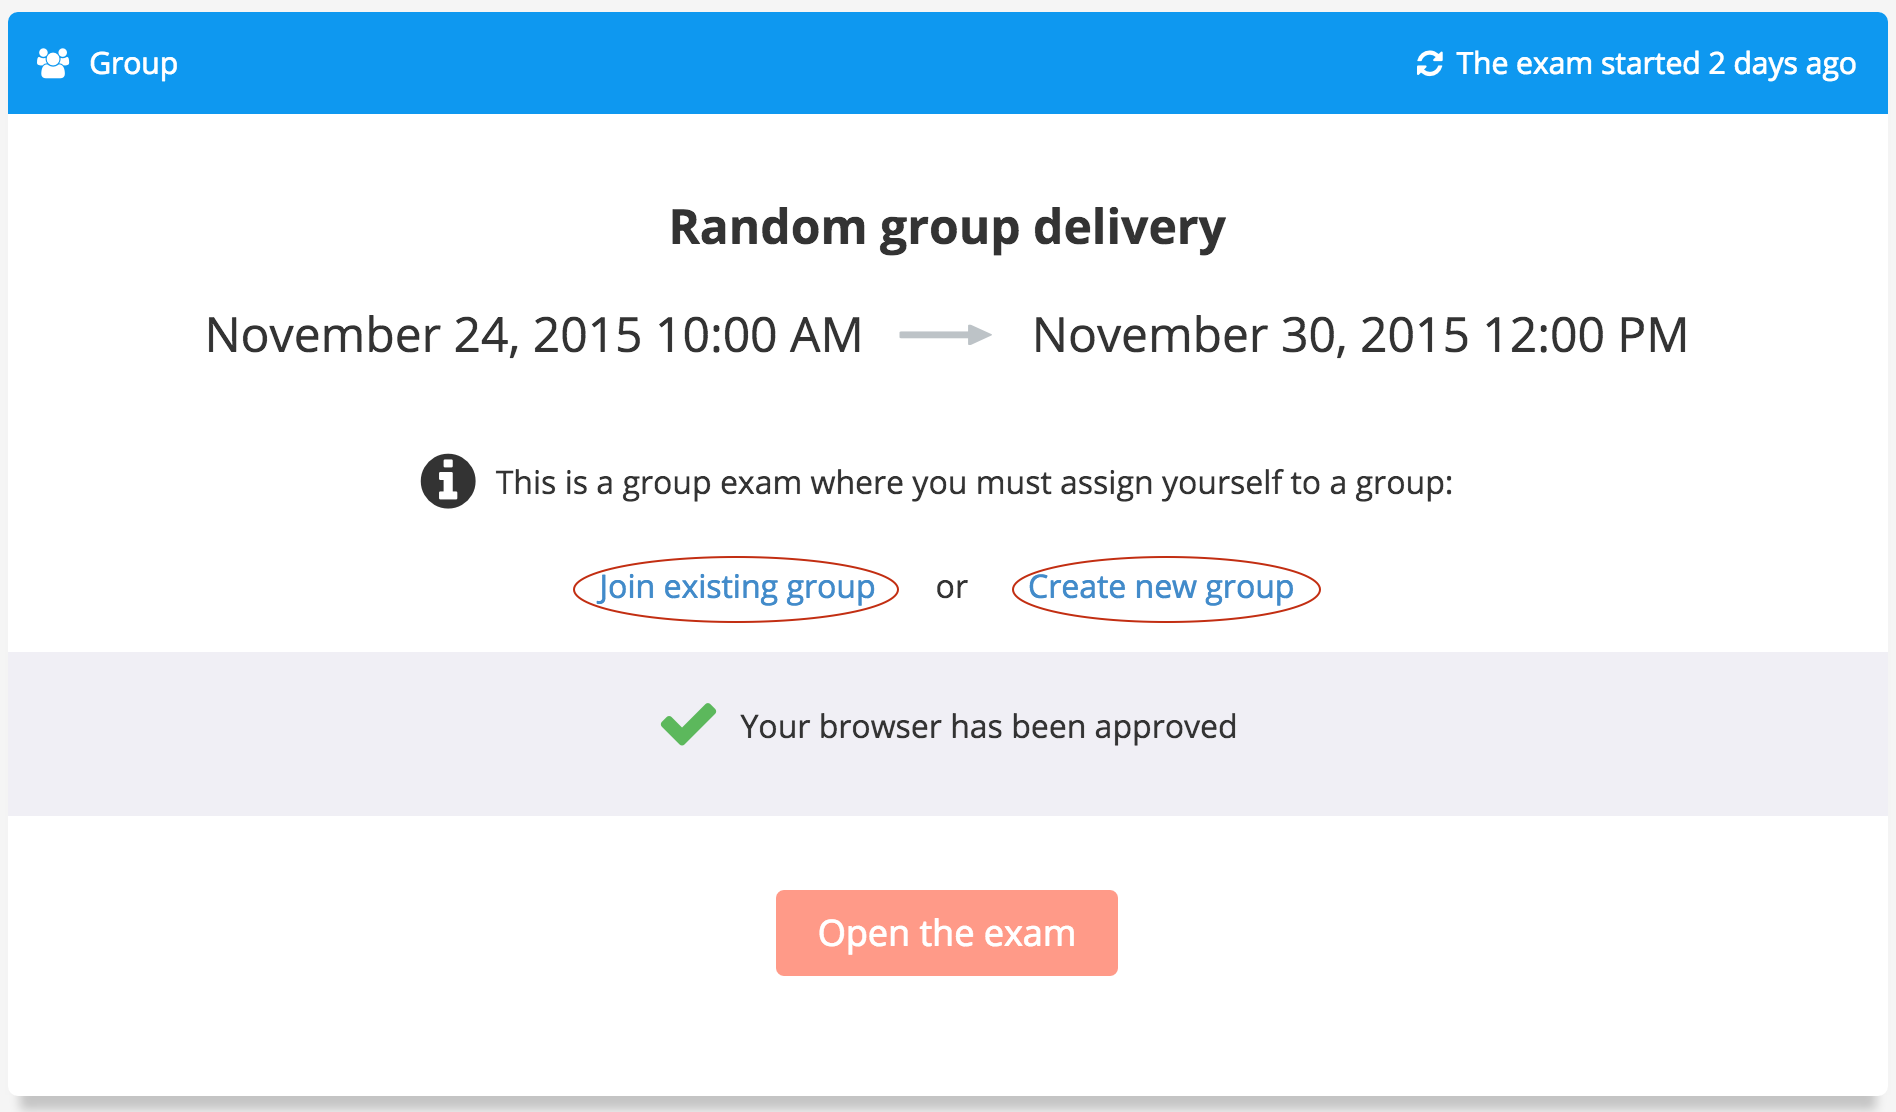
When the students log in to Inspera Assessment to take the exam, they are prompted that they are not yet a part of a group. Click on the "Click here to get ready" button to start the exam:
The student must choose either to "Join existing group" or "Create new group". She has to communicate with her fellow group members outside of the system to decide the members of the group and if the group has been created or not. If the group is not created yet, click on the "Create new group" link:
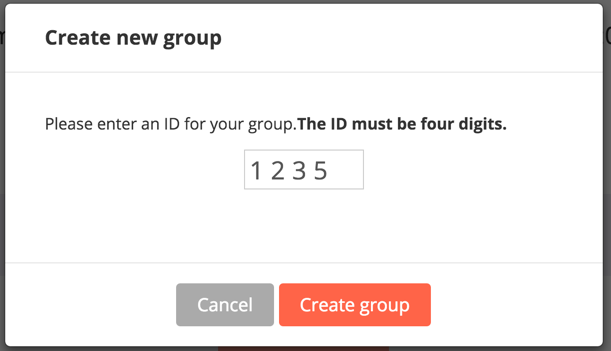
Enter an ID for your group, and click "Create group":
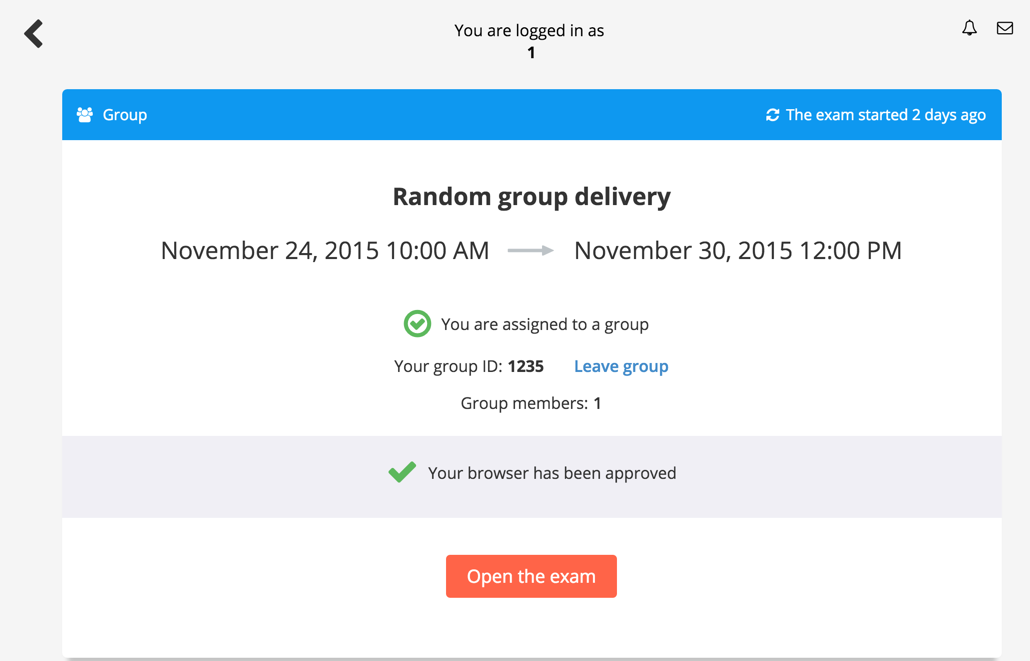
The group is now created, the student is assigned to the group, and is ready to start the exam:
The next student logging in wil now be able to join this group or create a new group. To join one of the created groups, click on the "Join excisting group" link:
The students must keep track of the group ID themselves. The student must enter the ID for the group she wants to join and then click "Join group":
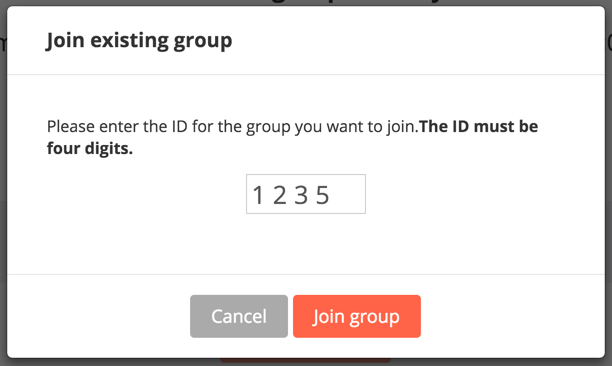
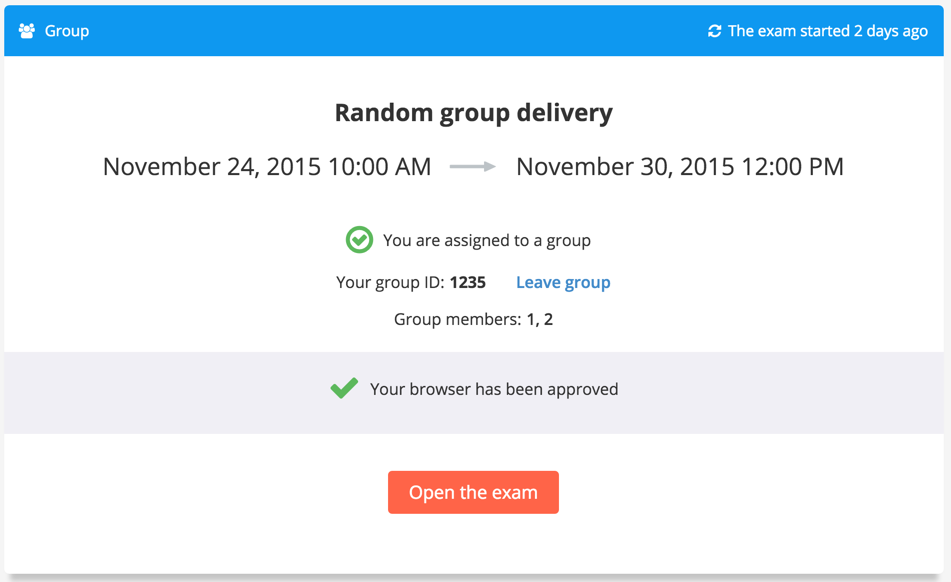
The candidate is now part of the group 1235:
How to Assign Groups to Committees
Follow the steps in this article. Although the article uses individual, not group deliveries as an example, the steps are the same for group deliveries.