Group delivery
Inspera Assessment supports both individual delivery and group delivery of exams. This article describes how group deliveries work.
Activate group submission
PLANNER
After assigning candidates to the test, either manually, via API or integration with external systems, go to the candidate list in the test. At the top right, you can switch from individual submission to group submission.
FS tests have to be disconnected from FS for the group test option to be available.
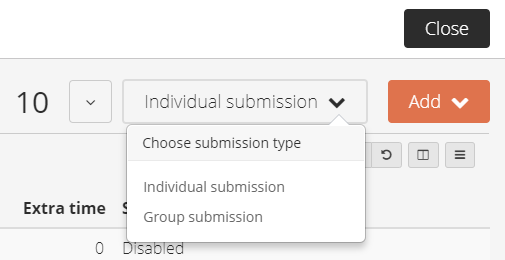
When group submission is activated, you are presented with four different ways of managing groups.
Create groups and add candidates randomly
This option lets you specify number of groups. Candidates per group will be randomly assigned, and as even as possible across the groups.
You can edit the group names or the number of groups later, the option is found the same place as in the screen shot above.
Create empty groups. I will add candidates manually to each group
You start by choosing the number of groups. When you click on Continue, you can name the groups. The candidates are not assigned automatically, so once the groups are created you choose the candidates in the list and go to Group Membership in the menu at the bottom of the page. Here you can choose the group the candidates shall belong to.
You can edit the group names or the number of groups later, the option is found the same place as in the screen shot above.
Enable candidates to create open groups
Choosing this will give you no further options. Everything from here on is done by the candidates themselves. The open student managed groups require a 4 digit group ID to be created, and students use this group ID to join existing groups.
The planner cannot make changes in student managed groups at any point.
Enable candidates to create password protected groups
NEW DECEMBER 8TH 2018
Choosing this will give you no further options. Everything from here on is done by the candidates themselves. The secure student managed groups are created the same way as the open groups. The difference is that when a secure group is created, a password is generated. The password is only accessible to existing group members. This password, together with group ID, is required for other students to join the group.
The planner cannot make changes in student managed groups at any point.
Important information about student managed groups.
When students manage the groups, the planner cannot make any changes to the groups. To enable changes after the test is completed, do the following:
- Open for resubmission for the group - this allows students to join and leave the group as if the test was still open (but it also gives them full access to the test again).
- Once the student has joined the correct group, close for resubmission. Choose Deliver current when asked, and all candidates in the group will now have status Submitted.
How to Assign Groups to Committees
Follow the steps in this article. Although the article uses individual, not group deliveries as an example, the steps are the same for group deliveries.
Student managed groups
LEARNER
Open student managed group
The first option is an open group where groups are created and candidates join by entering the group pin code. Open the test from Dashboard, and the options to join an existing group, or create a new group become available. When a new group is created, the student creating it automatically becomes a member.
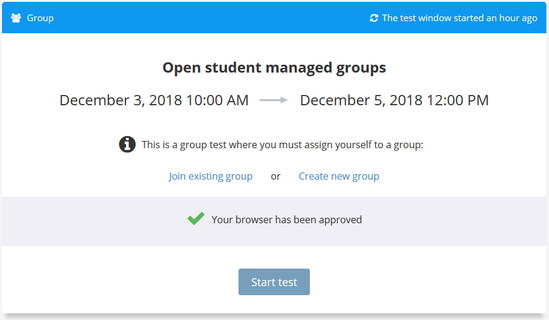
Either option will prompt for a group ID which must be four digits. When creating the group, you choose the group ID
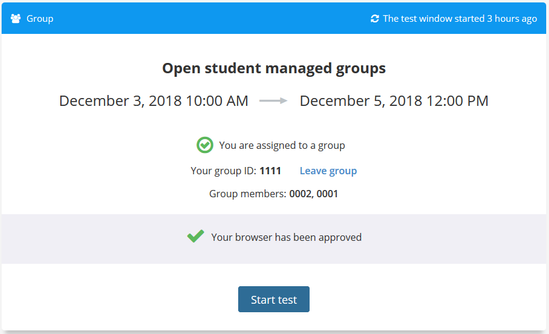
Once you have created the group, and become a member, you can open the test. And it now looks like this before opening the test:
Password protected student managed group
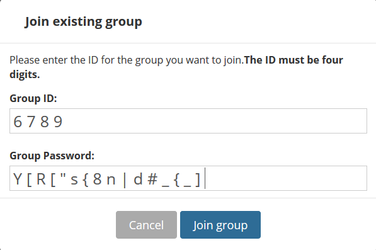
The second option is a secure group, where the first step is identical to the open student managed group and the group ID must be 4 digits. The biggest difference is that this group type requires a password for anyone to join an existing group. Anyone can create a group but only those who have the password for a group can join the group.
The one who created the group must initially distribute the password to the intended group members but any member can also generate a new password.
Candidates can join and leave groups at will, but must have the password for any group they want to join.
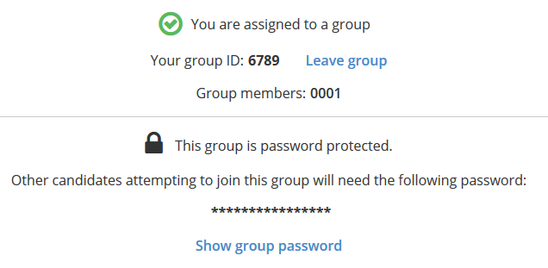
Once a group is created, a random 16 character password is generated and it now looks like this before opening the test:
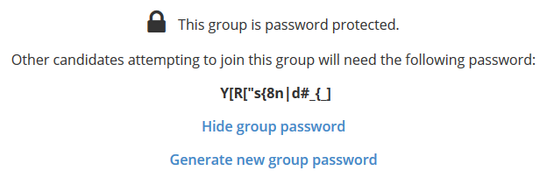
Clicking on Show group password will reveal the password, in addition to options to generate a new password, and hide the password again:
This is what it looks like when you try to become a member in an existing group: