Shared marks
This article will no longer be updated. New article available at support.inspera.com.
Norwegian: Prøveinnstillinger - Arbeidsflyt for sensorer
English: Test settings - Grading workflow
Use Shared marks to allow graders to build a single total mark pr candidate, as opposed to Individual marks
Why?
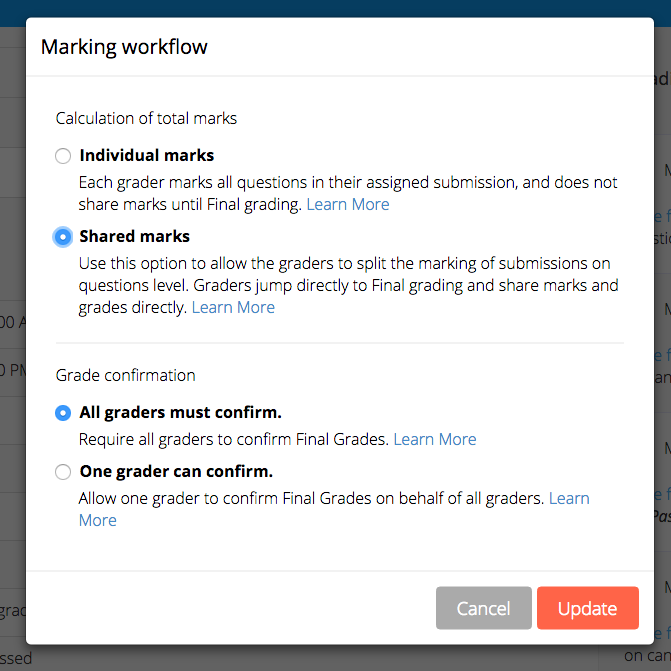
Use Shared marks when graders want to collaborate on building a single total mark pr candidate. Use this option to allow the graders to split the marking of submissions on questions level. Graders jump directly to final grading and share marks and grades. This mode is very useful if graders wants to split marking of questions, e.g. one grader marks question 1 and 2 and another grader marks question 3 and 4. The total marks is then the sum of the two graders marks.
The Shared Marks Workflow consists of several components
- Marking Workflow settings - Available to Planners
- Grading Event Log
- Grade Filters
Marking Workflow settings
Important
Set the Marking Workflow before the evaluators start grading. Marks set in "Individual marks" mode will not be visible or transferrable to the "Shared marks" mode
To activate Shared marks (Planners only), do the following:
- Open the test in the Grading tool
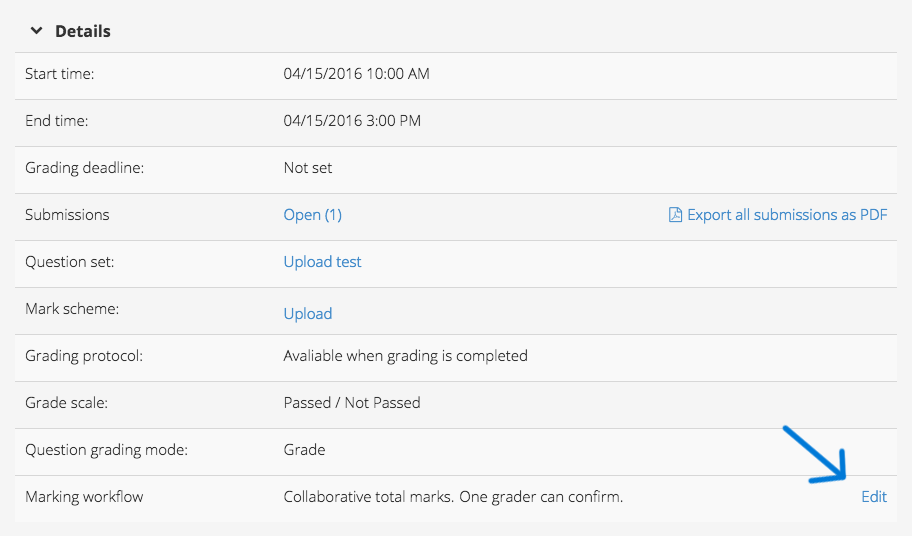
- In the Overview page, scroll down and expand Details
- In the Marking workflow row, press Edit:
- In the Modal view, select option Shared marks
- Press update
Working with shared marks (Graders)
When Collaborative Marking has been activated on the test, graders can simply start marking.
- By default, all graders can mark and grade all candidates and all questions
- Your Grading is automatically bypassed
- Distributing questions to mark is done by using the Grade Filters
- All marks and grades can be overridden by all graders
- The Grading Event log displays the history of all marked items
Distributing questions to mark among graders
With shared marks, graders can choose to "divide the pile" of submissions between them.
Example:
A test with 4 questions is due for marking:
- Grader 1 will mark question 1 and 2.
- Grader 2 will mark question 3 and 4
Step by step guide - Grader 1
- In the Grading overview page, select Open Final Grading
- In the candidate list, select any candidate in the list
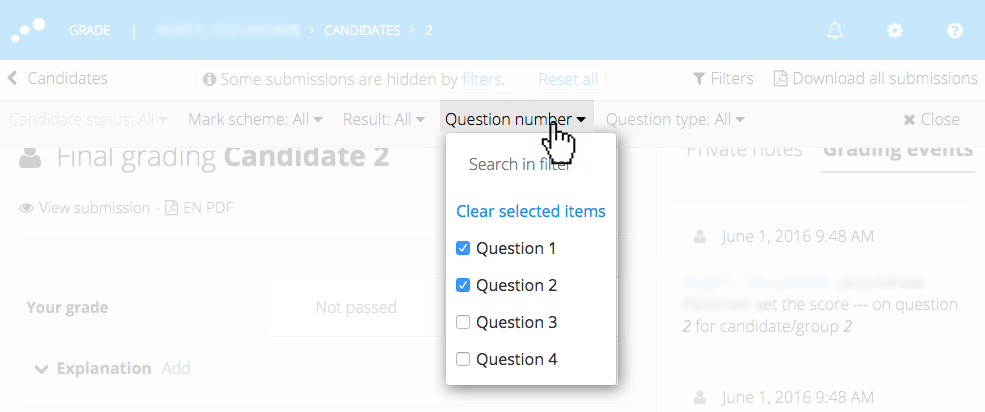
- On the candidate page, select Filters (Learn more about Grade Filters)
- In the filter menu, select Question number
- In the dropdown menu, select questions to mark. In this example, question 1 and 2. This will hide all other questions for all candidates.


