Guide for Planners
- Jens Andreas Pettersen (Unlicensed)
- Anja Sisarica
The following guide is written for participants of beta version 0.1. Subsequent beta releases will have separate guides.
Getting started
Tell us who you are
In order to activate the beta for your user account, we need you to send your Inspera User ID to project manager jiqing.qiang@inspera.no
- Log into Inspera Assessment
- From the cog-wheel (upper right corner), select Edit profile
- In the browser URL field, copy the seven digits in the end of the URL

Pick the right tests
The following requirements apply to test content and settings:
- Grader collaboration: Individual marks (Shared marks available later this week)
- Manual marking: Maximum marks (Banded marks and criteria marks not supported)
- Sections: No random pulling of questions from section (Random order supported)
- Section stimulus not showing
Manage your expectations
Version 0.1 is focused on single-user marking workflow and many features are still in development. In addition, several available beta 0.1 features have limited functionality. For example, the Candidate lists only includes a few columns and filtering is not yet available. Since the list of unavailable features in version 0.1 is longer than the list of available features, we recommend a quick review of the Feature list. Any graders invited to your tests should also be informed about these limitations.
On a high level, the following core functionality is not in the version 0.1 scope:
- Annotation / Feedback to students
- Criteria marking / Banded marking
- Confirming marks and grades
- Committees / Grading management
- Explanations
- Other UI languages than English
The tool is live and connected
As a general disclaimer, we would like to remind you that any marks or grades edited in the beta tool, are indeed updated on the server and applied to candidate results. Mark live exams at your own risk.
Step by step Guide
The Grading 2.0 tool is enabled per test, and when enabled the new tool behaves like an extension of the existing tool for both planners and graders. Grading 2.0 can be enabled on tests with any status (from drafts to graded).
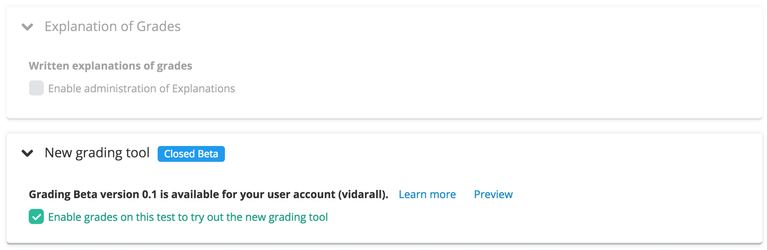
1 - Enable Grading 2.0 on your test
Grading beta can be enabled and disabled at any time during the test life cycle
- In Setup, scroll down to the last settings category
- Select Enable graders on this test to try out the new grading tool
Technical note
When enabling the beta for a given test, it might take a few minutes before all submissions are visible in the new grading tool. This is due to something called "on demand indexing", which is then triggered for that test when beta is enabled.
2 - Add yourself and/or a colleague as grader on the test
Beta version 0.1 is focused on essential marking and grading only. Planners have, as in the existing grading tool, read-only permissions for setting marks and grades, so to really test the user experience, you need to be a grader assigned to the specific test.
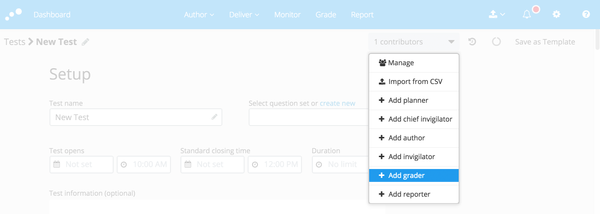
Assigning graders is done in a regular way
A note on inviting graders to version 0.1
As Planner you are free to invite any user with regular Grader user permissions to your test. These users are not required to sign up for the beta. Technically, there are no restrictions on the number of tests you can enable the beta on, or how many graders you can invite, but, in this very first release, we recommend keeping the total number of test-users below 10.
We also encourage you to inform these users by:
- Forwarding the Guide for Graders
- Promoting the Feedback form
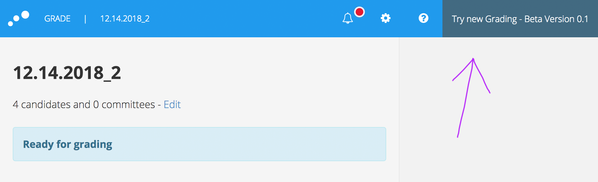
3 - Make your test Ready for grading
Before proceeding, make sure that your test meets the following requirements:
- One or more candidates have submitted
- End time has passed
4 - Open test in grading and select Try new Grading - Beta Version 0.1
The new tool will now open in an overlay.